toolivo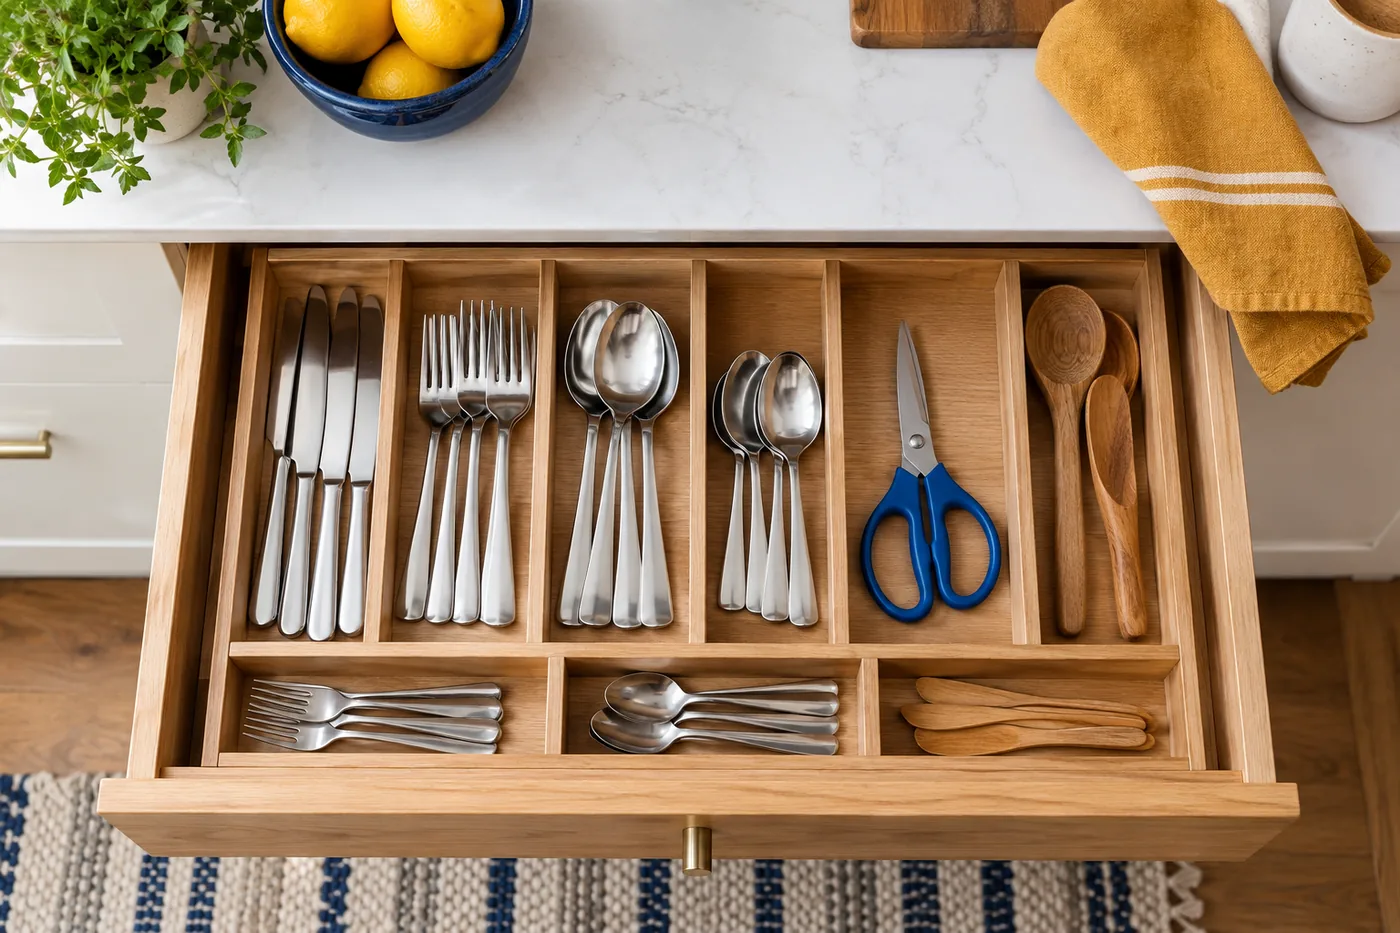
A useful utensil drawer answers a simple question without making you think: where is the tool you need next? It does not have to hold every kitchen implement you own, and it does not have to resemble a display. Its job is to make ordinary cooking, serving, and cleaning easier in the space you actually have. That usually means choosing a clear role for the drawer, allowing enough room around awkward objects, and giving frequently used tools the easiest positions.
Start with one drawer rather than emptying the entire kitchen. A drawer beside the preparation area might become the home for everyday cooking tools; a drawer closer to the table might suit cutlery and serving pieces. Those are possibilities, not rules. Watch the route you take while making a familiar meal. The best location is the one that shortens your real routine, including unloading clean utensils afterward.
Decide what this drawer needs to do
Before removing anything, write a short description of the drawer's purpose. “The tools we use to prepare dinner most evenings” is more useful than “utensils.” It sets a boundary that helps you judge the melon baller, spare corkscrew, and assortment of takeaway cutlery without debating each object from scratch. If the drawer serves two purposes, name both. A small kitchen may reasonably combine eating cutlery with a few cooking tools.
Next, identify the moments when the current arrangement fails. Perhaps you lift a spatula to reach the can opener, small measuring spoons disappear below larger tools, or the drawer catches on an upright handle. These are different problems. They may call for separate compartments, better visibility, or more overhead clearance. Buying a divided tray before naming the problem risks replacing one awkward arrangement with a more expensive version of the same arrangement.
Choose one measurable improvement for your first reset. You might want to retrieve your five most-used tools without moving anything else, or put away clean cutlery without rearranging the tray. A practical target makes it easier to stop. You are creating a working drawer, not searching for a permanently perfect arrangement that can accommodate every future cooking habit.
Measure the usable space, including the opening
Empty the drawer onto a towel or clear surface and clean the interior as appropriate for its finish. Measure the inside width, front-to-back depth, and available height. Also notice anything that reduces the usable area: curved corners, screw heads, a sloping back, or a lip around the opening. Write the measurements down rather than relying on a rough memory while comparing organizers.
Height is easy to misunderstand. The drawer's side walls may be taller than the space available when it closes. Return the tallest awkward tool, close the drawer gently, and check whether it moves freely. Do not force a catching drawer. A ladle can require more clearance than its handle suggests, while tongs may spring open unless their own closure keeps them compact. These shapes deserve an actual fit check.
Measure the utensils as well as the drawer. A compartment that accommodates teaspoons may be too short for dinner knives. An expandable tray can fit the drawer width yet leave a narrow strip that is useless for your particular tools. For an illustrative drawer measuring 42 centimeters wide and 46 centimeters deep, a 40-centimeter tray might appear suitable, but a long whisk could still require a separate lengthwise lane. The object dimensions decide whether the layout works.
Sort by use before sorting by shape
Make four temporary groups: used most days, used regularly but not daily, used occasionally, and uncertain. Keep this classification grounded in recent meals. If you make rice several times a week, the rice paddle belongs with everyday tools even if it would be considered specialized in another home. A glamorous utensil that rarely leaves the drawer does not earn front-row space simply because it is associated with ambitious cooking.
Within those groups, look for duplicates that serve a genuine purpose. Two spatulas may be useful when cooking several dishes, while six nearly identical peelers may reflect years of accidental accumulation. You do not need to reduce every category to one object. Instead, ask how many you use between ordinary washing cycles and whether the extras have a defined backup role. Separate that backup from the active set.
Set uncertain items aside in a clearly labeled temporary container outside the prime drawer. Give yourself a review point tied to normal cooking, such as after several ordinary shopping and meal cycles. If you retrieve something, return it to an appropriate permanent location. If you never need it, you have useful evidence for deciding whether to keep it elsewhere or pass it on. Avoid letting the temporary container become an unexplained second utensil drawer.
Build the layout around reach and sequence
Place the most frequently reached-for items where your hand naturally lands when the drawer is comfortably open. In many kitchens that will be near the front, but the direction you approach matters. If you stand to one side, the opposite rear corner may be especially inconvenient. Try reaching into the empty drawer from your usual position before deciding where the busiest compartment should sit.
Group tools that participate in the same small task when doing so improves retrieval. A peeler and a small preparation tool might share a lane; measuring spoons and measuring cups may form another group if their shapes fit together. Do not force task groupings when they create tangles. Nested measuring cups could need their own space, while a broad whisk may sit more comfortably beside other long tools.
Leave a little room to lift each object. A drawer that is packed edge to edge may technically contain everything but still be annoying to use. The goal is not to maximize the count of utensils per square centimeter. You want visible handles, separable categories, and enough clearance to return an object without aiming precisely. If a compartment only works when every handle faces one exact angle, it may be too full for ordinary use.
Choose dividers only after testing the arrangement
Lay out the tools directly in the empty drawer first. Use folded paper strips or small existing boxes to mark proposed boundaries temporarily. Open and close the drawer, take out a few tools, and put them back. This simple rehearsal can reveal that two skinny compartments should become one broad section, or that a tray needs to sit slightly off center to accommodate a long handle.
A fixed cutlery tray is convenient when its compartments match your utensils. Adjustable dividers offer more flexibility for irregular cooking tools but may shift if their fit is poor. Small separate bins make it easy to customize a mixed drawer, although gaps between them can collect stray items. Choose according to the drawer's contents and dimensions rather than assuming one organizer type is universally superior.
Check whether the proposed system is easy to clean and move. A collection of tiny containers may keep objects meticulously separated but create many pieces to lift during a reset. A single tray is simpler to remove but less adaptable. If you are using materials already at home for a trial, treat the trial as information gathering. You can replace a successful temporary arrangement later without buying accessories for a layout that has not proved itself.
Give awkward tools an honest amount of space
Ladles, balloon whisks, potato mashers, and bulky grips often cause more difficulty than the quantity of utensils alone. Arrange these individually before filling the remaining compartments. Look at their complete shapes, not just the handles. A whisk that extends over a neighboring lane effectively occupies both lanes, even when its handle has a neatly assigned position.
Some objects are better stored outside the chosen drawer. A frequently used long spoon might suit an existing countertop container if the counter can spare the space. An occasional serving implement might belong with serving dishes. This is not a failure of the reset. Matching an object to a more suitable location can release valuable drawer capacity without reducing the tools available to you.
Avoid creating a new inconvenience while solving the old one. Moving every large utensil to the counter may clear the drawer but crowd your preparation area. Moving occasional tools to a distant cupboard may be reasonable; moving the everyday spatula there probably is not. Evaluate the whole task: retrieving the tool, using it, washing it, and putting it away. A good home supports all four steps.
Make room for more than one cook
When several people use the kitchen, agree on category names that make sense to everyone. “Prep tools” might be too broad, while “peeling and opening” may describe a recognizable group. Let another person unload a small batch of clean utensils into your trial layout without coaching. Their hesitation can show where a boundary is unclear or where two compartments look equally plausible.
Different people may have different everyday tools. Ask each regular cook which few items they want to retrieve most easily. Give those items reasonable access rather than organizing exclusively around the person doing the reset. If one person cooks breakfast and another prepares dinner, the drawer can support both routines with neighboring sections. You do not need separate drawers to acknowledge separate habits.
Labels can help during the transition, especially in a drawer with several mixed-use sections. Keep them broad enough to survive small changes. Labeling a compartment “measuring” is usually more useful than listing every spoon size. Once the arrangement becomes familiar, labels can stay or go. Their purpose is to reduce uncertainty, not to impose a particular visual style on the kitchen.
Test the drawer through ordinary meals
Live with the layout before making further purchases. Pay attention to friction rather than appearance: which tool becomes buried, which divider shifts, which category overflows, and which item is repeatedly returned to the wrong place. These small patterns reveal more than a photograph of the freshly arranged drawer. Make notes if the problems are easy to forget by the time you have a free moment.
For example, imagine a household that initially places all cooking tools in one wide compartment and all measuring equipment in another. After a few meals, the tongs repeatedly cover the peeler, but the measuring compartment has unused room. The useful adjustment is to give the peeler and opener a small front section, borrowing space from measuring. There is no need to replace the entire system.
Change one or two things at a time. If you rearrange every compartment after each frustrating moment, nobody can learn the layout and you cannot tell which adjustment helped. Once the main problems are resolved, stop refining. A drawer that stays easy to use during a busy week is more successful than one that requires constant attention to maintain its ideal arrangement.
Keep the reset small enough to repeat
Build maintenance around an event that already happens, such as returning the last batch of clean utensils or wiping nearby kitchen surfaces. Straighten displaced tools, remove obvious intruders, and check that the drawer closes freely. This should be a brief restoration of the agreed arrangement. If it regularly becomes a lengthy sorting session, the categories or capacity need another look.
New utensils need a deliberate destination. Before adding one, decide whether it replaces an existing tool, fills a real gap, or belongs in occasional storage. A gift does not automatically need prime drawer space, and a newly purchased item should not quietly displace a more useful one. Treat the drawer's comfortable capacity as a practical boundary rather than a challenge to overcome with another layer of organizers.
A seasonal cooking project may temporarily require different tools. Let the drawer adapt, then restore its everyday role when the project ends. Keeping a cake-decorating tool at the front during a baking weekend is sensible; leaving the entire decorating collection there afterward may not be. The arrangement is allowed to change as long as each change supports a recognizable routine.
Check the space when everything is clean
Judge the final capacity when the ordinary utensils have all returned from washing. A layout can appear generous while several large tools are on the draining board. Place the full everyday set in its intended compartments and repeat the retrieval test. If the last clean items cannot return comfortably, the drawer needs a smaller active set or a revised division.
Also check whether a tray slides when the drawer moves. A shifting tray can gradually erase the helpful gap you created for a long utensil. Use an organizer that fits reliably and follow its installation directions if it has an adjustment mechanism. The layout should stay understandable during normal opening and closing, without requiring constant correction.
Questions that come up during a drawer reset
What if there is only one drawer for everything?
Divide it by the frequency and shape of its contents, giving everyday eating and cooking tools the easiest access. Keep occasional serving pieces elsewhere if possible. Use broad, visible compartments rather than many tiny sections. The drawer can have several functions, but each function needs a clear location and a realistic share of the available space.
Should all the handles face the same direction?
Only when that makes retrieval and return easier. Consistent orientation can help with cutlery, while alternating the direction of bulky tools may use space more effectively. Test whether you can identify and lift each item comfortably. An arrangement that relies on everyone remembering an elaborate sequence will probably create more work than it saves.
How much empty space should I leave?
There is no single percentage that suits every drawer. Leave enough room to lift utensils without disturbing neighboring groups and to return a clean item without compressing the contents. If a normal washing cycle makes a compartment difficult to use, reduce its active contents or give it more room. Comfortable use is the better measure.
What should I do with a tool I use rarely but value?
Keep it in an occasional-use location with related equipment, and make that location easy to identify. A rarely used tool can still deserve a place in your kitchen. The distinction is between keeping it and giving it the most convenient storage position. Those are separate decisions, and making them separately often resolves the dilemma.
About this guide
Published by Toolivo Editorial. Our guides focus on practical household organization and adaptable room layouts.
Have a correction or a question? Contact Toolivo or read our editorial policy.